CS180 Project 4
Part 0: Camera Calibration and 3D Scanning
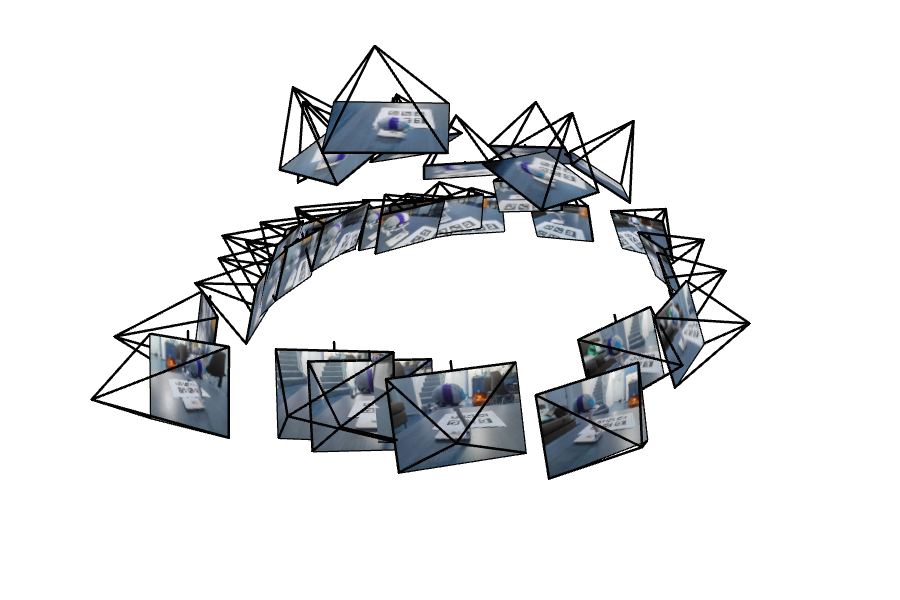
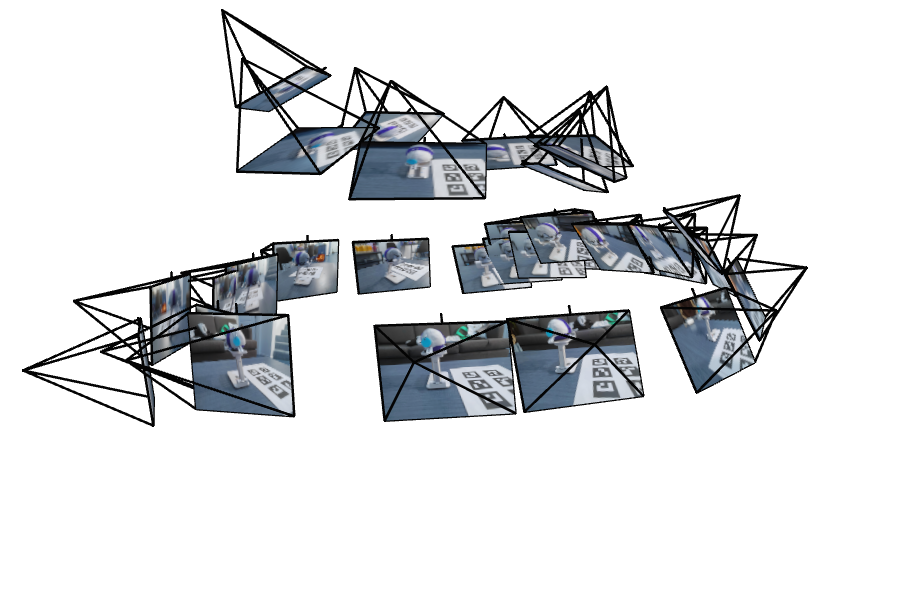
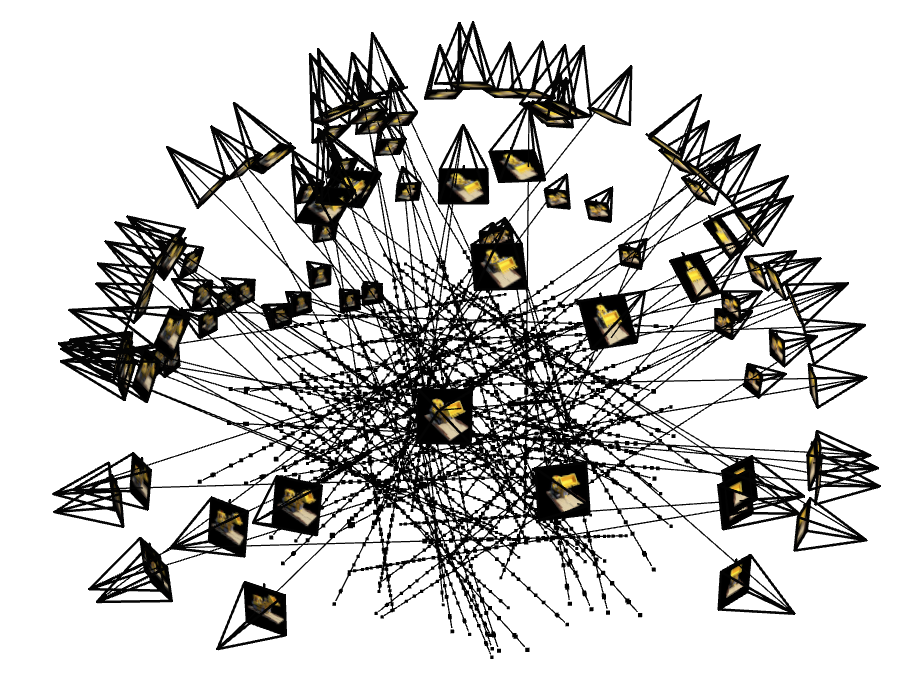
In this part of the project, we are required to conduct the full pipeline of Neural Radiance Field(NeRF). Here, I took 33 photos of an object from different viewpoints with distance 10 ~ 20cm. After calibrating the intrinsics of my phone camera, I got the following intrinsics: \[ \begin{bmatrix} f_x & 0 & c_x \\ 0 & f_y & c_y \\ 0 & 0 & 1 \end{bmatrix} \] where \(f_x = 2775.42\) and \(f_y=2773.99\) are the focal lengths in the x and y directions, respectively, and \(c_x=1950\) and \(c_y=1454\) are the principal points in the x and y directions, respectively. Then, with the images, I derived the camera's extrinsic parameters for each of them. Here are the visualizations of them:
Part 1: Fit a Neural Field to a 2D Image
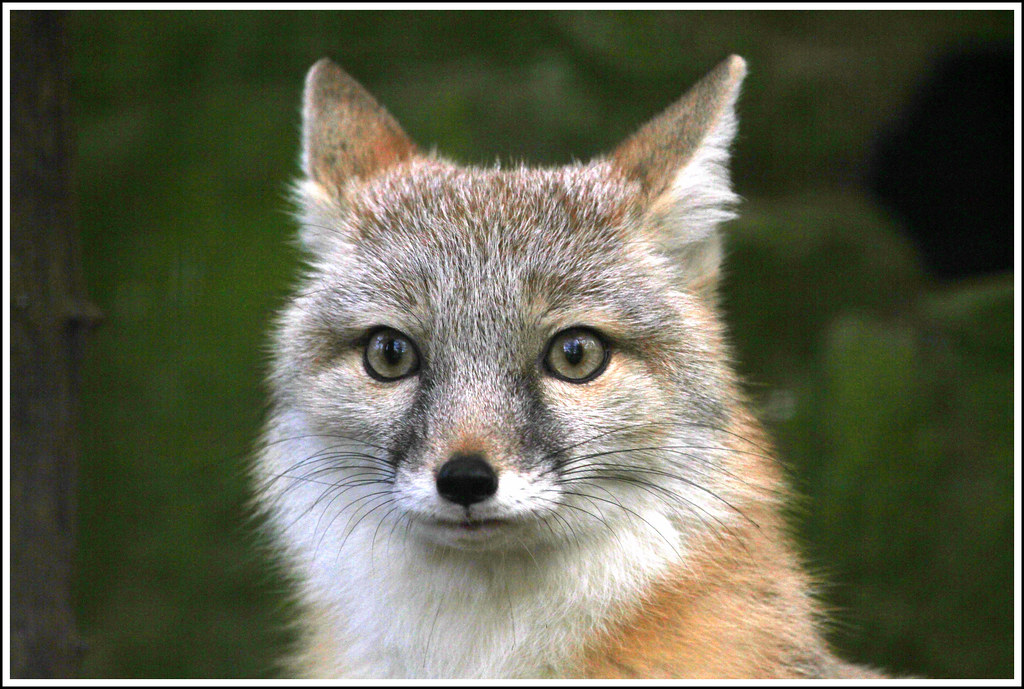
In this part, I started by fitting MLPs to two images shown below:

In the MLPs, positional encodings(PE) are added before the fully connected layers. To fit them, I used the following training settings and derived the following results:
| Image index | Image size | Training epochs | Learning rate | PE frequencies | Hidden features | Hidden layera | Batch Size | Test PSNR |
|---|---|---|---|---|---|---|---|---|
| 1 | 1024*689 | 6000 | 1e-3 | 10 | 512 | 4 | 4096 | 30.56 dB |
| 2 | 3904*2928 | 6000 | 2e-3 | 10 | 512 | 4 | 8192 | 35.12 dB |
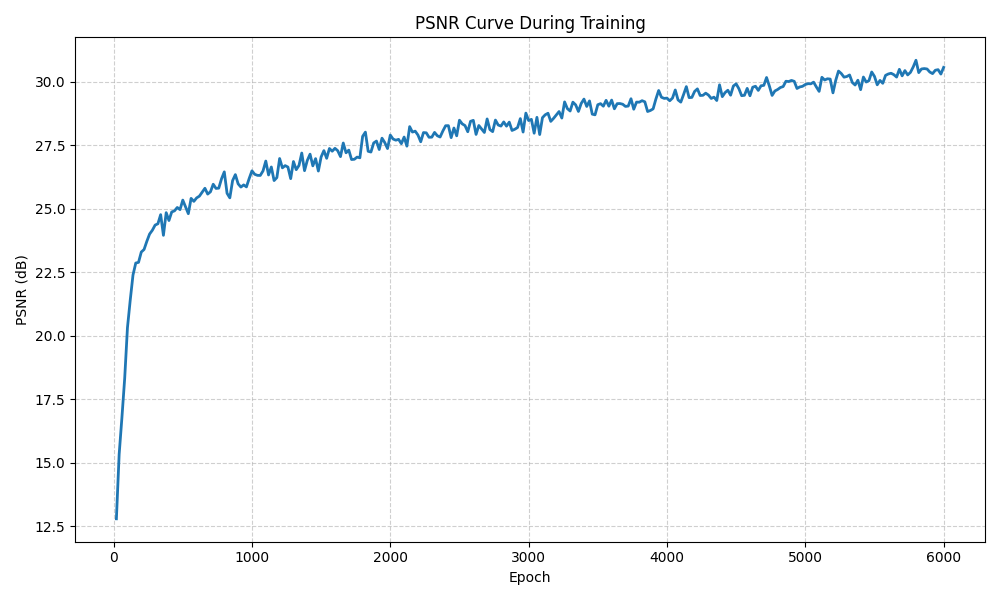
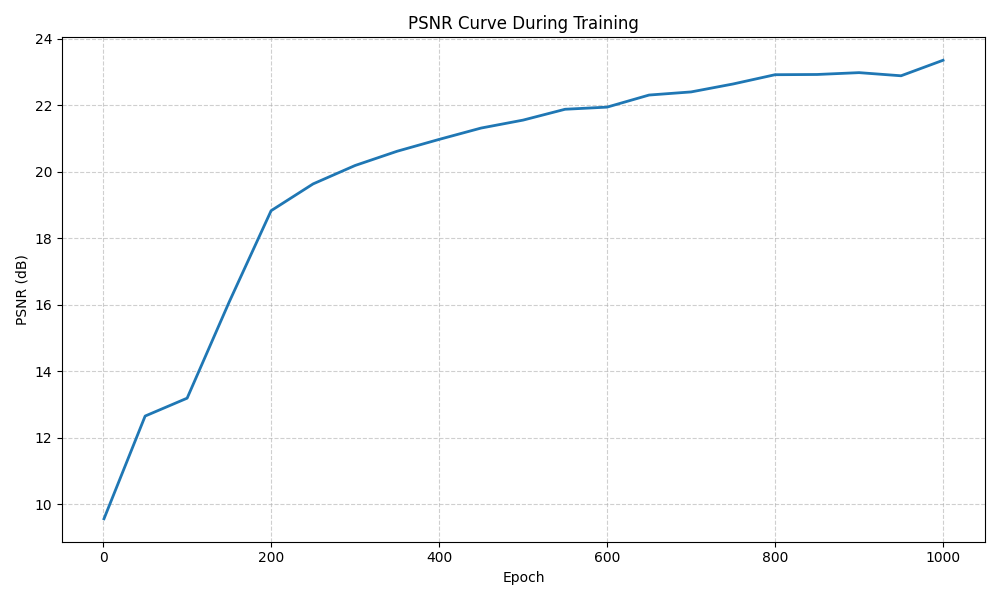
Here are the visualizations of the training progress and PNSR curve of test image 1 are shown:


Also, there are ablation studies on the effect of network width and positional encoding frequency on PSNR of image 1:
| Hidden features | Freq = 10 | Freq = 30 |
|---|---|---|
| 128 | 26.63 | 26.45 |
| 512 | 30.56 | 30.17 |
Summary: Increasing the network width from 128 to 512 significantly improves the reconstruction quality, raising PSNR from roughly 26.5 dB to over 30 dB. However, increasing the positional encoding frequency from 10 to 30 yields little improvement and may slightly reduce stability, suggesting that a moderate frequency (around 10) is sufficient for this image.
Part 2: Fit a Neural Radiance Field from Multi-view Images
Train with the Lego dataset
In this section, I implemented the following functions to transform between camera and world coordinates:
1. transform(c2w, x_c)
Converts camera coordinates to world coordinates.
Each camera-to-world matrix (c2w) is applied to the homogeneous pixel points x_c,
adding a homogeneous 1 and multiplying by the 4*4 extrinsic matrix to obtain world positions.
Broadcasting enables batch processing of multiple rays or cameras.
2. pixel_to_camera(K, uv, s)
Transforms 2D pixel coordinates (u, v) into 3D camera-space coordinates.
It inverts the intrinsic matrix K and multiplies it by the homogeneous pixel coordinates,
scaling by the depth factor s.
This defines where each pixel lies in the camera coordinate frame.
3. pixel_to_ray(K, c2w, uv)
Computes the origin and direction of camera rays.
It first converts pixel positions to camera space using pixel_to_camera,
then transforms them to world space using transform.
The ray direction is normalized as:
r_d = (x_w - o) / ||x_w - o||
where o is the camera center from c2w.
4. sample_along_rays(rays_o, rays_d, near, far, n_samples, perturb)
Uniformly samples 3D points along each ray between near and far bounds.
Random perturbation can be added for anti-aliasing.
Returns the 3D sample positions and their corresponding depth values t_i.
5. RaysData class
Loads all training images, camera intrinsics (K), and extrinsics (c2w).
Provides two ray sampling modes:
sample_rays: samples rays across multiple random images.sample_rays_single: samples rays from one random image.
Each method returns a tuple (ray_o, ray_d, pixel_color)
used for batched NeRF training.
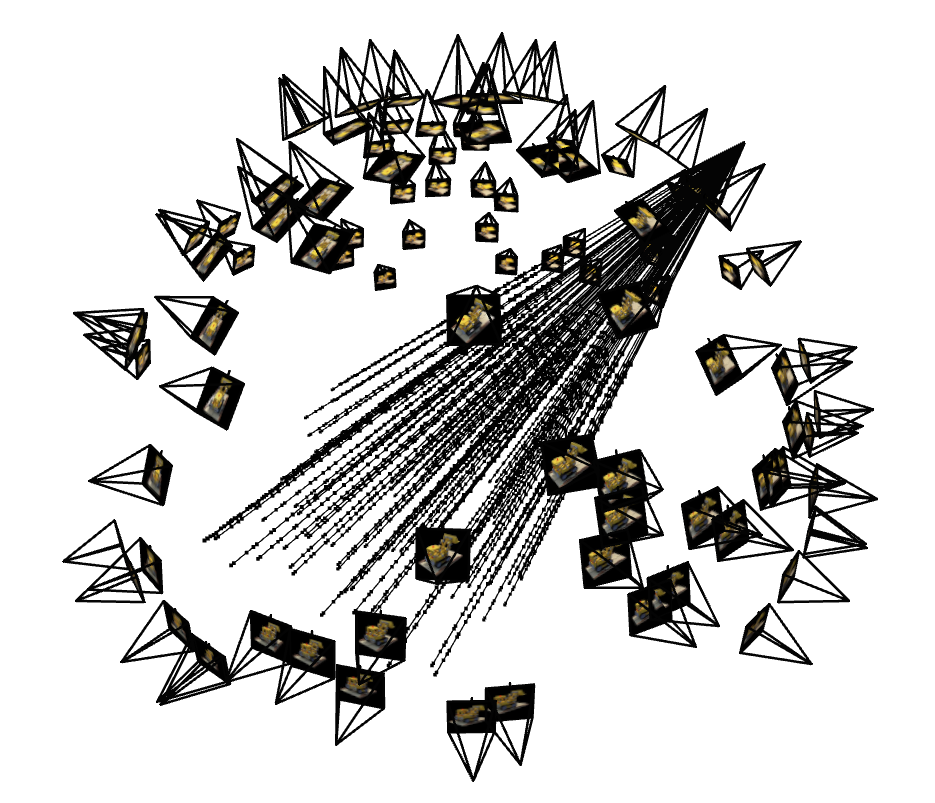
The following figures show the samples and rays from multiple/one camera views:
With such procedure and the training settings identical to the suggested in the project description, I obtained the following results with validation PSNR 23.35 dB:

Also, I attempted to improve the reconstruction performance by adjusting the hyperparameters,
with the new setting pos_freqs=15, dir_freqs=6, hidden_dim=512, lr=2e-4, num_epochs=5000, batch_size=10000, num_sample = 128.
Clearly, the new setting leads to a higher validation PSNR 26.21 dB.
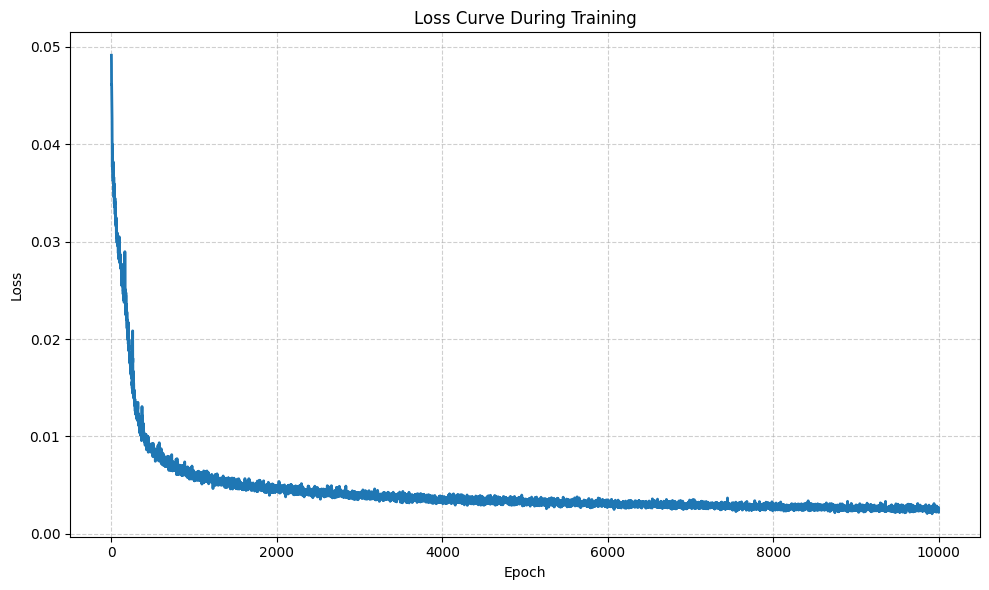
Training with my own dataset
To conduct experiment on a different dataset, I made the adjustment on hyperparameter,
with the new setting having lr=1e-3, num_epochs=10000, batch_size=8192, num_samples = 128
Here are the training progress and derived novel view rendering results:


see the video here.